gRPC
To round off the list of useful Google technologies for now, let’s look at gRPC. Building on top of Protocol Buffers, it enables a language agnostic RPC definition. Similar to protobufs, auto-generated source code for a long list of compatible languages can easily be integrated. This includes the source for both the client and the server side. The communication is by protobuf objects, over HTTP.
Proto Service
Like protobufs, the RPC service API is defined in a .proto file.
Notice the service and rpc keywords. Within a service, there can be one or more rpc methods. The method declaration follows the pattern “rpc MethodName (InputType) returns (ReturnType) {}”. However, as opposed to many languages, there can only be one input and one return object, which means that it is common to have dedicated Request and Response types with nested fields.
Finally, the import statement includes the proto we looked in the previous example. The Person message can then be used in the fields (or grpc) of this proto file.
import "_includes/src/com/rememberjava/protobuf/person.proto";

service Greeter {
  rpc SayHello (HelloRequest) returns (HelloReply) {}
}

message HelloRequest {
  Person from = 1;
  Person to = 2;

  string message = 3;
}

message HelloReply {
  string reply = 1;
}
Bazel
To compile the gRPC service code, we need an additional Bazel rule. Now, gRPC compile rules have changed frequently over the years, often with incompatible versions and upgrades. For now, we’re using the java_grpc_library rule from rules_proto_grpc_java. This rule will also compile the imported person.proto.
Notice the protos field, similar to srcs in other rules. It takes the proto_library dependencies of all protos and dependencies to compile.
load("@rules_proto_grpc_java//:defs.bzl", "java_grpc_library")

proto_library(
    name = "hello_proto",
    srcs = ["hello.proto"],
    deps = [
        "//_includes/src/com/rememberjava/protobuf:person_proto",
    ],
)

java_grpc_library(
    name = "hello_java_grpc",
    protos = [
        ":hello_proto",
        "//_includes/src/com/rememberjava/protobuf:person_proto",
    ],
)
Finally, there are two java_binary rules for the server and client which we’ll look at next.
java_binary(
    name = "HelloServer",
    srcs = ["HelloServer.java"],
    deps = [":hello_java_grpc"],
)

java_binary(
    name = "HelloClient",
    srcs = ["HelloClient.java"],
    deps = [":hello_java_grpc"],
)
Server
This examples includes a very minimal server class, which combines the main, start and RPC methods. Typically, these would be split over multiple classes and files.
First, the sayHello RPC method, which takes the protobufs HelloRequest input and HelloReply output as parameters. Within the methods, the usual protobuf generated API methods apply.
    @Override
    public void sayHello(HelloRequest request,
			 StreamObserver<HelloReply> responseObserver) {
	String from = request.getFrom().getFirstname();
	String to = request.getTo().getFirstname();
	System.out.println("Server: " + from + " says hello to " + to);

	HelloReply response = HelloReply
	    .newBuilder()
	    .setReply(to + " sends greetings.")
	    .build();

	responseObserver.onNext(response);
	responseObserver.onCompleted();
    }
To start and let the server run, a io.grpc.Server objected is constructed our GreeterGrpc as the Service. This runs in blocking mode.
    void start() throws IOException, InterruptedException {
	int port = 1234;

	System.out.println("Starting gRPC HelloServer on port " + port);

	ServerBuilder<?> serverBuilder = Grpc.newServerBuilderForPort(
	    port, InsecureServerCredentials.create());
	Server server = serverBuilder.addService(this).build();
	server.start();
	server.awaitTermination();
    }
Client
Finally, we fire up a minimal gRPC client to make a request on the server. It news a channel, a stub (which has the service API) and a request. After the call, the reply from the server is printed and we shutdown and exit.
    void hello() {
	int port = 1234;

	ManagedChannel channel = ManagedChannelBuilder.forAddress("localhost", port)
          .usePlaintext().build();

	GreeterGrpc.GreeterBlockingStub stub =
	    GreeterGrpc.newBlockingStub(channel);

	HelloRequest request = HelloRequest.newBuilder()
	    .setFrom(Person.newBuilder()
		     .setFirstname("Foo").build())
	    .setTo(Person.newBuilder()
		   .setFirstname("Bar").build())
	    .build();

	HelloReply reply = stub.sayHello(request);
	System.out.println("Reply on client: " + reply.getReply());

	channel.shutdown();
    }
Run it
To run the server and client, use two separate terminal windows and call, in order:
bazel run :HelloServerbazel run :HelloClientFiles
Here are files includes in this example:
syntax = "proto3";

import "_includes/src/com/rememberjava/protobuf/person.proto";

option java_package = "com.rememberjava.grpc";
option java_multiple_files = true;

service Greeter {
  rpc SayHello (HelloRequest) returns (HelloReply) {}
}

message HelloRequest {
  Person from = 1;
  Person to = 2;

  string message = 3;
}

message HelloReply {
  string reply = 1;
}syntax = "proto3";
option java_package = "com.rememberjava.protobuf";
option java_multiple_files = true;
message Person {
string firstname = 1;
string lastname = 2;
int32 id = 3;
string email = 4;
}load("@rules_proto_grpc_java//:defs.bzl", "java_grpc_library")
proto_library(
name = "hello_proto",
srcs = ["hello.proto"],
deps = [
"//_includes/src/com/rememberjava/protobuf:person_proto",
],
)
java_grpc_library(
name = "hello_java_grpc",
protos = [
":hello_proto",
"//_includes/src/com/rememberjava/protobuf:person_proto",
],
)
java_binary(
name = "HelloServer",
srcs = ["HelloServer.java"],
deps = [":hello_java_grpc"],
)
java_binary(
name = "HelloClient",
srcs = ["HelloClient.java"],
deps = [":hello_java_grpc"],
)package com.rememberjava.grpc;
import java.io.IOException;
import io.grpc.Grpc;
import io.grpc.InsecureServerCredentials;
import io.grpc.Server;
import io.grpc.ServerBuilder;
import io.grpc.stub.StreamObserver;
import com.rememberjava.grpc.GreeterGrpc;
import com.rememberjava.grpc.HelloReply;
import com.rememberjava.grpc.HelloRequest;
class HelloServer extends GreeterGrpc.GreeterImplBase {
@Override
public void sayHello(HelloRequest request,
StreamObserver<HelloReply> responseObserver) {
String from = request.getFrom().getFirstname();
String to = request.getTo().getFirstname();
System.out.println("Server: " + from + " says hello to " + to);
HelloReply response = HelloReply
.newBuilder()
.setReply(to + " sends greetings.")
.build();
responseObserver.onNext(response);
responseObserver.onCompleted();
}
void start() throws IOException, InterruptedException {
int port = 1234;
System.out.println("Starting gRPC HelloServer on port " + port);
ServerBuilder<?> serverBuilder = Grpc.newServerBuilderForPort(
port, InsecureServerCredentials.create());
Server server = serverBuilder.addService(this).build();
server.start();
server.awaitTermination();
}
public static void main(String[] args) throws IOException, InterruptedException {
new HelloServer().start();
}
}package com.rememberjava.grpc;
import io.grpc.ManagedChannel;
import io.grpc.ManagedChannelBuilder;
import com.rememberjava.protobuf.Person;
import com.rememberjava.grpc.GreeterGrpc;
import com.rememberjava.grpc.HelloReply;
import com.rememberjava.grpc.HelloRequest;
class HelloClient {
void hello() {
int port = 1234;
ManagedChannel channel = ManagedChannelBuilder.forAddress("localhost", port)
.usePlaintext().build();
GreeterGrpc.GreeterBlockingStub stub =
GreeterGrpc.newBlockingStub(channel);
HelloRequest request = HelloRequest.newBuilder()
.setFrom(Person.newBuilder()
.setFirstname("Foo").build())
.setTo(Person.newBuilder()
.setFirstname("Bar").build())
.build();
HelloReply reply = stub.sayHello(request);
System.out.println("Reply on client: " + reply.getReply());
channel.shutdown();
}
public static void main(String[] args) {
new HelloClient().hello();
}
}Protocol Buffers
Protocol Buffers (aka “protobufs”) is another Google technology which integrates neatly with Java (and other languages). As their tag-lines says: “Protocol Buffers are language-neutral, platform-neutral extensible mechanisms for serializing structured data”.
For the sake of this example, we will look at 1) definition of a “proto” file; 2) integration with Bazel; 3) and use in a small Java test example.
Proto Message
At the heart of protobufs is the Message, which is an abstract language agnostic definition of a data class. As any class, the Message has fields, which can be of a few basic common native types or other Message types. Thus, any data structure can be realised.
For this example, let’s take the Person message from the official example. It comes with a few basic fields:
message Person {
string firstname = 1;
string lastname = 2;
int32 id = 3;
string email = 4;
}The proto file is compiled using the protoc command line tool, which will produce language specific source code to depend on.
Bazel
For the sake of this example, we will use Bazel to build. It has native (more or less) support for protobufs. No extra dependencies are needed in the MODULE.bazel nor the BUILD file.
There are two rules to specify, one for the proto itself and one for the Java specific library. The latter will depend on the former:
proto_library(
name = "person_proto",
srcs = ["person.proto"],
)
java_proto_library(
name = "person_java_proto",
deps = [":person_proto"],
)This can now be compiled using:
bazel build :person_java_protoUse in Java code
The generated class will be available for import as any other class. Notice the package, which is defined specifically for Java at the top of the .proto file.
import com.rememberjava.protobuf.Person;A proto message can be instantiated using its builder methods. The instance is immutable.
Person person = Person.newBuilder()
.setFirstname("Bob")
.setLastname("Johnson")
.setEmail("bob@example.com")
.build();The official example shows a slightly more complex structure, with nested objects:
Person john =
Person.newBuilder()
.setId(1234)
.setName("John Doe")
.setEmail("jdoe@example.com")
.addPhones(
Person.PhoneNumber.newBuilder()
.setNumber("555-4321")
.setType(Person.PhoneType.PHONE_TYPE_HOME)
.build());
.build();Files from this example:
syntax = "proto3";

option java_package = "com.rememberjava.protobuf";
option java_multiple_files = true;

message Person {
  string firstname = 1;
  string lastname = 2;
  int32 id = 3;
  string email = 4;
}package com.rememberjava.protobuf;
import com.rememberjava.protobuf.Person;
import static org.junit.Assert.*;
import org.junit.Test;
public class PersonTest {
@Test
public void testPerson() {
Person person = Person.newBuilder()
.setFirstname("Bob")
.setLastname("Johnson")
.setEmail("bob@example.com")
.build();
assertEquals("Bob", person.getFirstname());
}
}package(default_visibility = ["//visibility:public"])
proto_library(
    name = "person_proto",
    srcs = ["person.proto"],
)

java_proto_library(
    name = "person_java_proto",
    deps = [":person_proto"],
)
java_test(
name = "PersonTest",
size = "small",
srcs = ["PersonTest.java"],
deps = [
":person_java_proto",
],
)Bazel ❤ Java
Bazel is an open-source build and test tool similar to Make, CMake, Maven, and Gradle. It is cross platform, and as opposed to the mentioned tools, it supports a plethora of languages; many natively and almost anything else by extendable rules and tool chains.
Bazel’s strong points are a human-readable high-level build and dependency language (in contrast to Make or CMake), and having the dependency graph between modules and projects as the foundation of the build processing itself. This means that all actions, builds and tests can be cached deterministically, and only need to be re-executed if there are actual changes.
Finally, Bazel integrates seamlessly with external projects, source and project repositories, whether Git, Github, Pip, Maven repository, or simply downloaded tar.gz files. As is common, dependencies can be locked to specific versions and verified with check-sums.
Install
Installing Bazel is a breeze, and multiple alternatives are supported. My personal preference is to use their Debian / Ubuntu apt repository. When using Github Action, pre-built images and caching is readily available and easy to use, as seen here.
Build and test
To start using Bazel in an existing code base takes minimal setup. The bare minimum is 1) MODULE.bazel file at top level repository directory (at first, it can be empty), and 2) at least one BUILD file which defines a build rule, for example a unit test. These two commits put in place the top level files and the first BUILD file in our Git code.
A simple test rule might look like this:
java_test(
    name = "HelloJunit",
    srcs = ["HelloJunit.java"],
)
It’s a Java Junit test, and it is given a name, which by convention is the same as the testcase file, and finally it specifies the source file(s).
Here’s another example, which defines a library, a binary, and a unit test. The two later depend on the library.
java_library(
    name = "Model",
    srcs = [
	"Expression.java",
	"Node.java",
	"Operator.java",
	"Tree.java",
	"Value.java",
        "Model.java",
    ]
)

java_binary(
    name = "Calculator",
    srcs = [
	"Button.java",
	"ButtonType.java",
	"Controller.java",
	"UiFrame.java",
        "CalculatorMain.java",
    ],
    deps = [
        ":Model",
    ]
)

java_test(
    name = "ModelTest",
    srcs = ["ModelTest.java"],
    deps = [
        ":Model",
    ]
)
To build and execute these tests, various query strings can be used. The first builds and runs only a single test in the current directory:
bazel test :HelloJunitTo run all test at and below the current directory, the ... query is used:
bazel test ...A // at the beginning references the top level. Thus, this runs all tests:
bazel test //...To execute a binary, the run command is used:
bazel run :CalculatorFor even more Bazel examples, including other languages, see our Bazel Examples repository.
Hello world with LibGDX
libGDX is a cross-platform Java game development library. It supports Windows, Gnu/Linux, Android, iOS, Mac, and web. The desktop variations use the Lightweight Java Game Library (LWJGL), with OpenGL support. There are already good comprehensive tutorials out there, so this article will only present the “Hello World” example with a small animation.
As opposed to basic OpenGL libraries, LibGDX and LWJGL offer a complete framework for creating a game, animations or interactions. To lower the bar to entry, the ApplicationListener interface has the common methods, most important the render() method, which is automatically called in a loop.
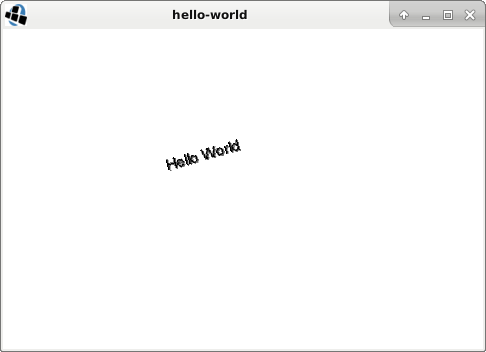
In the example below, a rotation matrix is defined and set, followed by drawing of the words “Hello World”. Because this method is called in a loop, the angle variable will update, and thus set a new rotation matrix every time. Similarly, the color is updated for each frame. The effect is a continuous never-ending animation.
  @Override
  public void render() {
    Gdx.gl.glClearColor(1, 1, 1, 1);
    Gdx.gl.glClear(GL20.GL_COLOR_BUFFER_BIT);

    Matrix4 rotate = new Matrix4();
    rotate.rotate(new Vector3(0, 0, 1), angle--);
    rotate.trn(200, 200, 0);
    batch.setTransformMatrix(rotate);

    batch.begin();
    font.setColor(new Color(color++ % 255));
    font.draw(batch, "Hello World", -40, 0);
    batch.end();
  }
There are multiple GDX packages, for different platforms and features, and for this example the following three are needed from the Maven Central repository. Be sure to include the natives-desktop version annotation on the gdx-platform package. For other platforms, e.g. Android, other packages are needed.
repositories {
  mavenCentral()
}

dependencies {
  compile 'com.badlogicgames.gdx:gdx:1.9.6'
  compile 'com.badlogicgames.gdx:gdx-platform:1.9.6:natives-desktop'
  compile 'com.badlogicgames.gdx:gdx-backend-lwjgl:1.9.6'
}
Here is the full code, as a stand-alone application.
package com.rememberjava.graphics;

import com.badlogic.gdx.ApplicationListener;
import com.badlogic.gdx.Gdx;
import com.badlogic.gdx.backends.lwjgl.LwjglApplication;
import com.badlogic.gdx.backends.lwjgl.LwjglApplicationConfiguration;
import com.badlogic.gdx.graphics.Color;
import com.badlogic.gdx.graphics.GL20;
import com.badlogic.gdx.graphics.g2d.BitmapFont;
import com.badlogic.gdx.graphics.g2d.SpriteBatch;
import com.badlogic.gdx.math.Matrix4;
import com.badlogic.gdx.math.Vector3;

public class LibGdxHelloWold implements ApplicationListener {

  private SpriteBatch batch;
  private BitmapFont font;

  private float angle;
  private int color;

  public static void main(String[] args) {
    LwjglApplicationConfiguration cfg = new LwjglApplicationConfiguration();
    cfg.title = "hello-world";
    cfg.width = 480;
    cfg.height = 320;

    new LwjglApplication(new LibGdxHelloWold(), cfg);
  }

  @Override
  public void create() {
    batch = new SpriteBatch();
    font = new BitmapFont();
    font.setColor(Color.RED);
  }

  @Override
  public void dispose() {
    batch.dispose();
    font.dispose();
  }

  @Override
  public void render() {
    Gdx.gl.glClearColor(1, 1, 1, 1);
    Gdx.gl.glClear(GL20.GL_COLOR_BUFFER_BIT);

    Matrix4 rotate = new Matrix4();
    rotate.rotate(new Vector3(0, 0, 1), angle--);
    rotate.trn(200, 200, 0);
    batch.setTransformMatrix(rotate);

    batch.begin();
    font.setColor(new Color(color++ % 255));
    font.draw(batch, "Hello World", -40, 0);
    batch.end();
  }

  @Override
  public void resize(int width, int height) {}

  @Override
  public void pause() {}

  @Override
  public void resume() {}
}
TLS 1.2 over SUN HttpsServer
Security can be tricky, HTTPS and TLS no less so. There are many configuration details to be aware of, and the encryption algorithms and cipher suites are moving targets, with new vulnerabilities and fixes all the time. This example does not go into all these details, but instead shows a basic example of how to bring up a HTTPS server using a self-signed TLS 1.2 key and certificate.
The main component of Java TLS communication is the Java Secure Socket Extension (JSSE). A number of algorithms and cryptographic providers are supported. The central class is the SSLContext, supported by the KeyStore. These classes load and initialise the relevant keys, certificates, and protocols which are later used by a HTTPS server (or client). See the Oracle blog, for another brief introduction to TLS 1.2, and tips on diagnosing the communication. In particular, notice the unlimited strength implementations, which have to be downloaded separately, and copied to JAVA_HOME/lib/security.
The example below shows how the certificate and key are loaded from a Java KeyStore (.jks) file, and used to initialise the SSLContext with the TLS protocol. The SSLContext is passed to the SUN HttpsServer through a HttpsConfigurator. The HttpsServer implementation takes care of the rest, and the static file handler is the same as seen in the plain HTTP based example.
  void start() throws Exception {
    HttpsServer httpsServer = HttpsServer.create(new InetSocketAddress(PORT), 0);

    SSLContext sslContext = getSslContext();
    httpsServer.setHttpsConfigurator(new HttpsConfigurator(sslContext));

    httpsServer.createContext("/secure", new StaticFileHandler(BASEDIR));
    httpsServer.start();
  }

  private SSLContext getSslContext() throws Exception {
    KeyStore ks = KeyStore.getInstance("JKS");
    ks.load(new FileInputStream(KEYSTORE_FILE), KEYSTORE_PASSWORD.toCharArray());

    KeyManagerFactory kmf = KeyManagerFactory.getInstance("SunX509");
    kmf.init(ks, KEY_PASSWORD.toCharArray());

    TrustManagerFactory tmf = TrustManagerFactory.getInstance("SunX509");
    tmf.init(ks);

    SSLContext sslContext = SSLContext.getInstance("TLS");
    sslContext.init(kmf.getKeyManagers(), tmf.getTrustManagers(), null);

    return sslContext;
  }
The code also includes a hard-coded generation of the key and certificate. A normal server would of course not implement this, but it’s included here to make the example self-contained and working out of the box. The following command is executed, and a Java KeyStore file containing a RSA based 2048 bits key, valid for one year. The keytool command will either prompt for name and organisational details, or these can be passed in using the dname argument. Also notice that password to the keystore and key are different. Further usage details on keytool can be found here.
keytool -genkey -keyalg RSA -alias some_alias -validity 365 -keysize 2048  \
  -dname cn=John_Doe,ou=TestOrgUnit,o=TestOrg,c=US -keystore /tmp/test.jks -storepass pass_store -keypass pass_key
Since the certificate is self-signed, a modern browser will yield a warning, and not allow the communication to continue without an explicit exception, as seen below. For the sake of this example, that is fine. If we do allow the certificate to be used, we will see that the communication is indeed encrypted, “using a strong protocol (TLS 1.2), a strong key exchange (ECDHE_RSA with P-256), and a strong cipher (AES_128_GCM)”, aka “TLS_ECDHE_RSA_WITH_AES_128_GCM_SHA256”.
On the topic of keys and algorithms, Elliptic Curve Cryptography (ECC) is relevant. Digicert gives a brief introduction, with details on how to generate keys for Apache. Openssl has further information on EC using openssl.

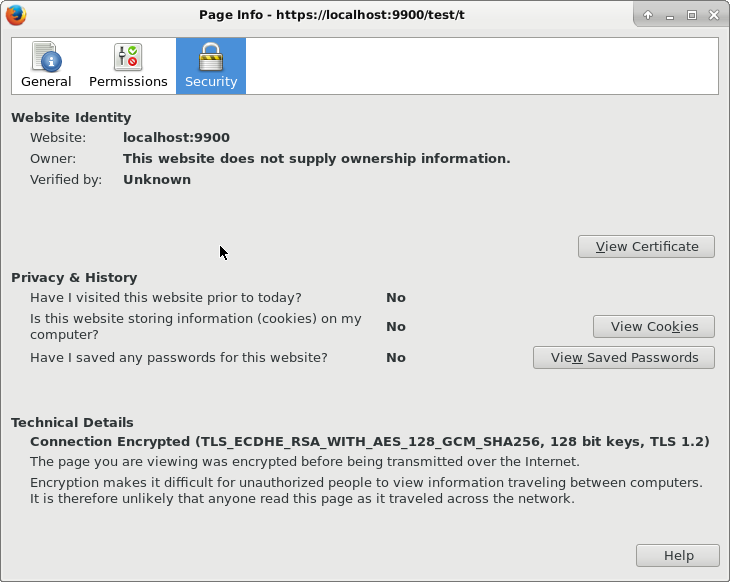
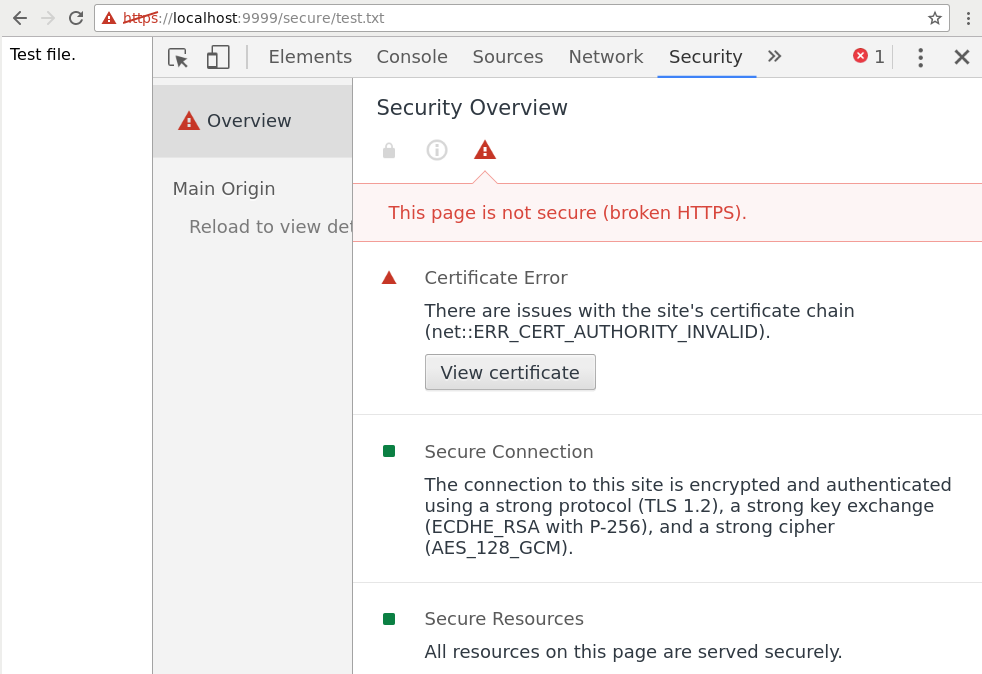
The two files below is all that is needed. A key and certificate is generate if not already present under /tmp/test.jks. Go to https://localhost:9999/secure/test.txt and enable the security exception to try it out. Also notice the logging in the console window of the server.
/* Copyright rememberjava.com. Licensed under GPL 3. See http://rememberjava.com/license */
package com.rememberjava.http;

import java.io.File;
import java.io.FileInputStream;
import java.lang.ProcessBuilder.Redirect;
import java.net.InetSocketAddress;
import java.security.KeyStore;

import javax.net.ssl.KeyManagerFactory;
import javax.net.ssl.SSLContext;
import javax.net.ssl.TrustManagerFactory;

import com.sun.net.httpserver.HttpsConfigurator;
import com.sun.net.httpserver.HttpsServer;

/**
 * A HTTPS server using a self-signed TLS 1.2 key and certificate generated by
 * the Java keytool command.
 *
 * Once running, connect to https://localhost:9999/secure/test.txt
 */
@SuppressWarnings("restriction")
public class SimpleHttpsServer {

  private static final File KEYSTORE_FILE = new File(System.getProperty("java.io.tmpdir"),
      "test.jks");

  private static final String KEYSTORE_PASSWORD = "pass_store";

  private static final String KEY_PASSWORD = "pass_key";

  private static final String BASEDIR = "com/rememberjava/http";

  private static final int PORT = 9999;

  public static void main(String[] args) throws Exception {
    System.setProperty("javax.net.debug", "all");

    generateCertificate();

    new SimpleHttpsServer().start();
  }

  /**
   * Generates a new self-signed certificate in /tmp/test.jks, if it does not
   * already exist.
   */
  static void generateCertificate() throws Exception {
    File keytool = new File(System.getProperty("java.home"), "bin/keytool");

    String[] genkeyCmd = new String[] {
        keytool.toString(),
        "-genkey",
        "-keyalg", "RSA",
        "-alias", "some_alias",
        "-validity", "365",
        "-keysize", "2048",
        "-dname", "cn=John_Doe,ou=TestOrgUnit,o=TestOrg,c=US",
        "-keystore", KEYSTORE_FILE.getAbsolutePath(),
        "-storepass", KEYSTORE_PASSWORD,
        "-keypass", KEY_PASSWORD};

    System.out.println(String.join(" ", genkeyCmd));

    ProcessBuilder processBuilder = new ProcessBuilder(genkeyCmd);
    processBuilder.redirectErrorStream(true);
    processBuilder.redirectOutput(Redirect.INHERIT);
    processBuilder.redirectError(Redirect.INHERIT);
    Process exec = processBuilder.start();
    exec.waitFor();

    System.out.println("Exit value: " + exec.exitValue());
  }

  void start() throws Exception {
    HttpsServer httpsServer = HttpsServer.create(new InetSocketAddress(PORT), 0);

    SSLContext sslContext = getSslContext();
    httpsServer.setHttpsConfigurator(new HttpsConfigurator(sslContext));

    httpsServer.createContext("/secure", new StaticFileHandler(BASEDIR));
    httpsServer.start();
  }

  private SSLContext getSslContext() throws Exception {
    KeyStore ks = KeyStore.getInstance("JKS");
    ks.load(new FileInputStream(KEYSTORE_FILE), KEYSTORE_PASSWORD.toCharArray());

    KeyManagerFactory kmf = KeyManagerFactory.getInstance("SunX509");
    kmf.init(ks, KEY_PASSWORD.toCharArray());

    TrustManagerFactory tmf = TrustManagerFactory.getInstance("SunX509");
    tmf.init(ks);

    SSLContext sslContext = SSLContext.getInstance("TLS");
    sslContext.init(kmf.getKeyManagers(), tmf.getTrustManagers(), null);

    return sslContext;
  }
}/* Copyright rememberjava.com. Licensed under GPL 3. See http://rememberjava.com/license */
package com.rememberjava.http;
import java.io.File;
import java.io.IOException;
import java.io.OutputStream;
import java.net.URI;
import java.nio.file.Files;
import com.sun.net.httpserver.Headers;
import com.sun.net.httpserver.HttpExchange;
import com.sun.net.httpserver.HttpHandler;
@SuppressWarnings("restriction")
public class StaticFileHandler implements HttpHandler {
private final String baseDir;
public StaticFileHandler(String baseDir) {
this.baseDir = baseDir;
}
@Override
public void handle(HttpExchange ex) throws IOException {
URI uri = ex.getRequestURI();
String name = new File(uri.getPath()).getName();
File path = new File(baseDir, name);
Headers h = ex.getResponseHeaders();
// Could be more clever about the content type based on the filename here.
h.add("Content-Type", "text/html");
OutputStream out = ex.getResponseBody();
if (path.exists()) {
ex.sendResponseHeaders(200, path.length());
out.write(Files.readAllBytes(path.toPath()));
} else {
System.err.println("File not found: " + path.getAbsolutePath());
ex.sendResponseHeaders(404, 0);
out.write("404 File not found.".getBytes());
}
out.close();
}
}Guava EventBus
Guava is Google’s utilities, collections and helpers library for Java. Similar in spirit to the Apache Commons set of libraries, but possibly a bit more pragmatic. Google’s engineers use the Guava components in their daily work, and have fine-tuned the APIs to boost their own productivity. The current release is version 21.
In this article, we’ll look at the Guava EventBus class, for publishing and subscribing to application wide events of all kinds. It strikes a good balance between convenience and type-safety, and is much more lightweight than rolling your own Event, Handler and Fire classes. See also the Guava documentations for further details.
To have an example to work with, the following Player skeleton class is implemented. It comes with three separate Event classes, which are very minimal in this contrived example. In a real application, they might inherit from a super-Event class, and possibly carry some content, at least the source of the event or similar. Alternatively, they could have been made simpler, by being elements of an enumeration, however, then we’d have to do manual matching and routing on the receiving end.
Notice, that the receiving part of the EventBus events is already in place, in the form of the @Subscribe annotations.
  class Player {
    boolean playing;
    boolean paused;

    @Subscribe
    void play(PlayEvent e) {
      System.out.println("play");
      playing = true;
      paused = false;
    }

    @Subscribe
    void pause(PauseEvent e) {
      System.out.println("pause");
      playing = false;
      paused = true;
    }

    @Subscribe
    void stop(StopEvent e) {
      System.out.println("stop");
      playing = false;
      paused = false;
    }
  }

  class PlayEvent {}

  class PauseEvent {}

  class StopEvent {}
In the following code, the EventBus is created, and the Player is registered as a receiver. To publish events, all that is required is to pass objects of the same types to the EventBus.post() method. The internals of the EventBus will invoke all methods which are marked with the @Subscribe annotation and match the exact type. Event types are not inherited, so a catch-all subscriber is not possible, which is probably a good design choice.
The EventBus also makes unit testing easier, since sender and receiver can be decoupled without extensive mocking. In fact, we now have a choice of testing the methods of the Player class through the Eventbus, or by invoking its methods directly. Either might be fine when writing unit tests. Although, for component level test, sticking with the EventBus is probably better, as it will be closer to the live application.
  private Player player;
  private EventBus bus;

  @Before
  public void setup() {
    player = new Player();

    bus = new EventBus();
    bus.register(player);
  }

  @Test
  public void testPlay() {
    bus.post(new PlayEvent());

    assertTrue(player.playing);
    assertFalse(player.paused);
  }
To include the Guava library from the Maven Gradle repository, this will suffice.
repositories {
  mavenCentral()
}

dependencies {
  compile 'com.google.guava:guava:21.0'
}
Here is the full code listing.
/* Copyright rememberjava.com. Licensed under GPL 3. See http://rememberjava.com/license */
package com.rememberjava.guava;

import static org.junit.Assert.assertFalse;
import static org.junit.Assert.assertTrue;

import org.junit.Before;
import org.junit.Test;

import com.google.common.eventbus.EventBus;
import com.google.common.eventbus.Subscribe;

public class EventBusTest {

  class Player {
    boolean playing;
    boolean paused;

    @Subscribe
    void play(PlayEvent e) {
      System.out.println("play");
      playing = true;
      paused = false;
    }

    @Subscribe
    void pause(PauseEvent e) {
      System.out.println("pause");
      playing = false;
      paused = true;
    }

    @Subscribe
    void stop(StopEvent e) {
      System.out.println("stop");
      playing = false;
      paused = false;
    }
  }

  class PlayEvent {}

  class PauseEvent {}

  class StopEvent {}

  private Player player;
  private EventBus bus;

  @Before
  public void setup() {
    player = new Player();

    bus = new EventBus();
    bus.register(player);
  }

  @Test
  public void testPlay() {
    bus.post(new PlayEvent());

    assertTrue(player.playing);
    assertFalse(player.paused);
  }

  @Test
  public void testAll() {
    bus.post(new Object());

    assertFalse(player.playing);
    assertFalse(player.paused);
  }
}
Cantor circles and recursion
This article draws inspiration from an old post dubbed “Cantor Circles”, but which turned out to render bisecting circles rather than Cantor sets. Nevertheless, it gained some interest, and the exact image below, from the 2002 post, can now be easily found on Google Image search. In this post, the old code is revived, and animation and colors are added for nice patterns and fun. Cantor’s ternary set is also implemented.
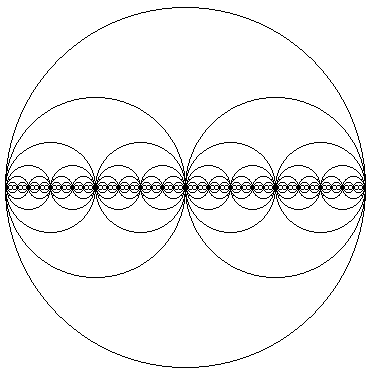
I suspect the origin of the bisecting circles was a simple example for recursive code, and simply dividing by two makes the code and rendering easy to understand. In the block below, the function drawCircles() is recursive, calling itself twice with parameters to half the next circles. A recursive function needs a stopping condition, and in this case it is the parameter times which stops further recursions when it reaches 0. The helper function drawMidCircle() makes it more convenient to set the coordinates and size of the circle.
  private void drawCircles(int x, int y, int radius, int times, Graphics g) {
    System.out.printf("x=%d, y=%d, r=%d, times=%d\n", x, y, radius, times);

    if (times > 0) {
      drawMidCircle(x, y, radius, g);
      drawCircles(x + radius / 2, y, radius / 2, times - 1, g);
      drawCircles(x - radius / 2, y, radius / 2, times - 1, g);
    }
  }

  private void drawMidCircle(int x, int y, int radius, Graphics g) {
    g.drawOval(x - radius, y - radius, 2 * radius, 2 * radius);
  }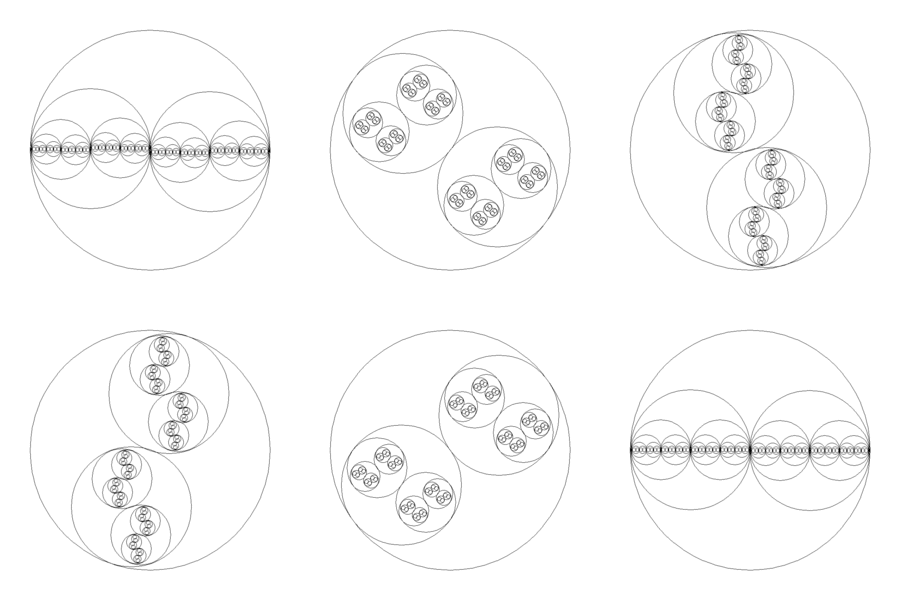
The next example adds animation. The recursion is the same, but adds an angle parameter to rotate the circles. Also notice that the angle a is negated, which leads to the alternating clockwise and counter-clockwise rotation within each small circle.
Also of interest here, is the Swing double buffering (actually, triple buffering is used in this example) using the BufferStrategy class. Notice that the paint() method of the Frame is no longer overridden to render the graphics, but rather the Graphics object is provided by the BufferStrategy and passed to the custom render() function.
  private void drawCircles(int x, int y, int r, double a, int times, Graphics g) {
    if (times <= 0) {
      return;
    }

    drawMidCircle(x, y, r, g);

    int x1 = (int) (r / 2 * cos(a));
    int y1 = (int) (r / 2 * sin(a));
    drawCircles(x + x1, y + y1, r / 2, -a, times - 1, g);
    drawCircles(x - x1, y - y1, r / 2, -a, times - 1, g);
} createBufferStrategy(3);
BufferStrategy strategy = getBufferStrategy();
new Thread(() -> {
while (true) {
Graphics g = strategy.getDrawGraphics();
render(g);
g.dispose();
strategy.show();
}
}).start();
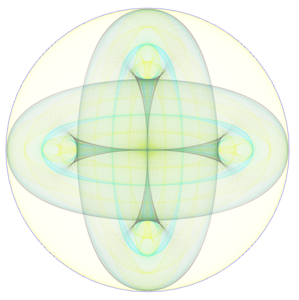
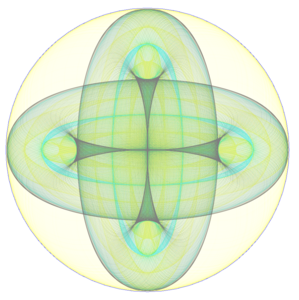
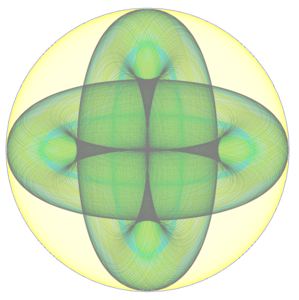
The last class in this article adds colors, a few options and a spartan UI to tune them. The images and animation below give a quick impression of what is possible by adjusting the sliders. Also note, the color palette can be easily changed during runtime by pasting in hex based color string found on pages like colourlovers.com.


The GIF animations were created using ImageMagick, with commands like these:
convert -delay 2 -loop 0 cantor*png cantor.gif
convert -delay 2 -loop 0 -resize 300x300 -layers Optimize -duplicate 1,-2-1 cantor0{0000..1200}.png cantor.gif/* Copyright rememberjava.com. Licensed under GPL 3. See http://rememberjava.com/license */
package com.rememberjava.graphics;
import java.awt.Color;
import java.awt.Graphics;
import javax.swing.JFrame;
/**
* Draws recursive circles
*/
@SuppressWarnings("serial")
class Cantor extends JFrame {
public static void main(String args[]) {
new Cantor();
}
Cantor() {
setDefaultCloseOperation(JFrame.EXIT_ON_CLOSE);
setSize(900, 900);
setVisible(true);
}
@Override
public void paint(Graphics g) {
g.setColor(Color.white);
g.fillRect(0, 0, getWidth(), getHeight());
g.setColor(Color.black);
drawCircles(450, 450, 400, 7, g);
}
private void drawCircles(int x, int y, int radius, int times, Graphics g) {
System.out.printf("x=%d, y=%d, r=%d, times=%d\n", x, y, radius, times);
if (times > 0) {
drawMidCircle(x, y, radius, g);
drawCircles(x + radius / 2, y, radius / 2, times - 1, g);
drawCircles(x - radius / 2, y, radius / 2, times - 1, g);
}
}
private void drawMidCircle(int x, int y, int radius, Graphics g) {
g.drawOval(x - radius, y - radius, 2 * radius, 2 * radius);
}
}/* Copyright rememberjava.com. Licensed under GPL 3. See http://rememberjava.com/license */
package com.rememberjava.graphics;
import static java.lang.Math.*;
import java.awt.Color;
import java.awt.Graphics;
import java.awt.image.BufferStrategy;
import javax.swing.JFrame;
/**
* Draws recursive spinning circles.
*
* Uses Double Buffering for smooth rendering. See:
* http://docs.oracle.com/javase/tutorial/extra/fullscreen/bufferstrategy.html
*/
@SuppressWarnings("serial")
class CantorSpin extends JFrame {
private final int size;
private double angle;
public static void main(String args[]) {
new CantorSpin(800);
}
CantorSpin(int size) {
this.size = size;
setDefaultCloseOperation(JFrame.EXIT_ON_CLOSE);
setSize(size, size);
setVisible(true);
    createBufferStrategy(3);
    BufferStrategy strategy = getBufferStrategy();

    new Thread(() -> {
      while (true) {
        Graphics g = strategy.getDrawGraphics();
        render(g);
        g.dispose();
        strategy.show();
      }
    }).start();
}
private void render(Graphics g) {
clear(g);
drawCircles(size / 2, size / 2, (int) (size * 0.4), angle, 7, g);
angle += 0.01;
}
private void clear(Graphics g) {
g.setColor(Color.white);
g.fillRect(0, 0, getWidth(), getHeight());
g.setColor(Color.black);
}
private void drawCircles(int x, int y, int r, double a, int times, Graphics g) {
if (times <= 0) {
return;
}
drawMidCircle(x, y, r, g);
int x1 = (int) (r / 2 * cos(a));
int y1 = (int) (r / 2 * sin(a));
drawCircles(x + x1, y + y1, r / 2, -a, times - 1, g);
drawCircles(x - x1, y - y1, r / 2, -a, times - 1, g);
}
private void drawMidCircle(int x, int y, int r, Graphics g) {
g.drawOval(x - r, y - r, 2 * r, 2 * r);
}
}/* Copyright rememberjava.com. Licensed under GPL 3. See http://rememberjava.com/license */
package com.rememberjava.graphics;
import static java.lang.Math.*;
import java.awt.BorderLayout;
import java.awt.Canvas;
import java.awt.Color;
import java.awt.Dimension;
import java.awt.Graphics;
import java.awt.event.ComponentAdapter;
import java.awt.event.ComponentEvent;
import java.awt.event.KeyAdapter;
import java.awt.event.KeyEvent;
import java.awt.image.BufferedImage;
import java.io.File;
import java.io.IOException;
import java.util.function.Consumer;
import javax.imageio.ImageIO;
import javax.swing.BoxLayout;
import javax.swing.JButton;
import javax.swing.JFrame;
import javax.swing.JLabel;
import javax.swing.JPanel;
import javax.swing.JSlider;
import javax.swing.JTextField;
import javax.swing.JToggleButton;
/**
* Draws recursive spinning circles with colors.
*/
@SuppressWarnings("serial")
class CantorColors extends JFrame {
private Canvas canvas;
private JPanel colorOut;
private String colorsList =
"#000fff,#18A3AC,#F48024,#178CCB,#052049,#FBAF3F,#000fff";
// "#18A3AC,#052049,#178CCB ,#FBAF3F,#F48024,#18A3AC,#052049,#178CCB";
// "#722059,#A92268,#E02477,#DB7580,#D6C689,#722059,#A92268,#E02477";
// "#F28E98,#FF9985,#E1CBA6,#DFCFB8,#E7E4D3,#F28E98,#FF9985,#E1CBA6";
private Color[] colors;
private double angle;
private double angleStepSize;
private double alternateSign;
private int sleepMs;
private float transparency;
private int recursions;
private boolean cantor;
private boolean clearScreen;
private boolean save;
private int index;
private BufferedImage bufImg;
private Graphics imgG;
public static void main(String args[]) {
CantorColors cc = new CantorColors();
cc.initUi();
cc.start();
}
private void initUi() {
setLayout(new BorderLayout());
canvas = new Canvas();
getContentPane().add(canvas, BorderLayout.CENTER);
JPanel controls = new JPanel();
controls.setLayout(new BoxLayout(controls, BoxLayout.Y_AXIS));
getContentPane().add(controls, BorderLayout.NORTH);
addSlider(controls, "Rotation step size", 1, 100, 5, slider -> {
angleStepSize = log(slider.getValue());
});
addSlider(controls, "Frame delay", 0, 100, 0, slider -> {
sleepMs = slider.getValue();
});
addSlider(controls, "Recursions", 1, 20, 7, slider -> {
recursions = slider.getValue();
});
addSlider(controls, "Transparency", 1, 1000, 1000, slider -> {
transparency = (float) slider.getValue();
colors = decodeColors(colorsList);
showColors();
});
JTextField colorIn = new JTextField(colorsList);
colorIn.addKeyListener(new KeyAdapter() {
public void keyTyped(KeyEvent e) {
colorsList = colorIn.getText();
colors = decodeColors(colorsList);
showColors();
}
});
controls.add(colorIn);
colorOut = new JPanel();
colorOut.setLayout(new BoxLayout(colorOut, BoxLayout.X_AXIS));
colors = decodeColors(colorsList);
showColors();
controls.add(colorOut);
JPanel buttons = new JPanel();
buttons.setLayout(new BoxLayout(buttons, BoxLayout.X_AXIS));
controls.add(buttons);
addToggleButton(buttons, "Bisect vs. Cantor", false, button -> {
cantor = button.isSelected();
});
addToggleButton(buttons, "Alternate rotation", true, button -> {
alternateSign = button.isSelected() ? -1 : 1;
});
addToggleButton(buttons, "Save PNGs", false, button -> {
save = button.isSelected();
index = 0;
});
JButton clearButton = new JButton("Clear");
clearButton.addActionListener(l -> {
clearScreen = true;
});
buttons.add(clearButton);
canvas.addComponentListener(new ComponentAdapter() {
@Override
public void componentResized(ComponentEvent e) {
createRenderImage();
}
});
setDefaultCloseOperation(JFrame.EXIT_ON_CLOSE);
setSize(600, 738);
setVisible(true);
}
private void addSlider(JPanel controls, String text, int min, int max, int value,
Consumer<JSlider> changeListener) {
JPanel row = new JPanel();
row.setLayout(new BoxLayout(row, BoxLayout.X_AXIS));
controls.add(row);
JLabel label = new JLabel(text);
label.setPreferredSize(new Dimension(150, (int) label.getPreferredSize().getHeight()));
row.add(label);
JSlider slider = new JSlider(min, max, value);
row.add(slider);
slider.addChangeListener(e -> {
changeListener.accept(slider);
});
}
private void addToggleButton(JPanel buttons, String text, boolean selected,
Consumer<JToggleButton> actionListener) {
JToggleButton button = new JToggleButton(text);
button.setSelected(selected);
buttons.add(button);
button.addActionListener(e -> {
actionListener.accept(button);
});
}
private void showColors() {
colorOut.removeAll();
colorOut.setBackground(Color.WHITE);
for (Color c : colors) {
JPanel l = new JPanel();
l.setPreferredSize(
new Dimension(getWidth() / colors.length, (int) l.getPreferredSize().getHeight()));
l.setBackground(c);
colorOut.add(l);
}
colorOut.revalidate();
colorOut.repaint();
}
private void start() {
transparency = 1000f;
angleStepSize = 0.005;
alternateSign = -1;
recursions = 7;
colors = decodeColors(colorsList);
showColors();
createRenderImage();
Graphics g = canvas.getGraphics();
new Thread(() -> {
while (true) {
render(imgG);
if (save && index++ % 3 == 0) {
saveImage(bufImg, index);
}
g.drawImage(bufImg, 0, 0, this);
sleep(sleepMs);
}
}).start();
}
private void createRenderImage() {
bufImg = new BufferedImage(canvas.getWidth(), canvas.getHeight(), BufferedImage.TYPE_INT_ARGB);
imgG = bufImg.createGraphics();
clear(imgG);
}
private void saveImage(BufferedImage bi, int i) {
try {
String name = String.format("/tmp/cantor%05d.png", i);
ImageIO.write(bi, "PNG", new File(name));
} catch (IOException e) {
e.printStackTrace();
}
}
/**
* Given a string of comma separated hex encoded RGB values, creates the
* individual Color objects. All spaces are removed and ignored; the hex
* values can be prefixed by a hash (#) or not. Adds the alpha transparency
* setting from the UI.
*/
private Color[] decodeColors(String hexColors) {
try {
String[] split = hexColors.replaceAll(" +", "").split(",");
Color[] result = new Color[split.length];
for (int i = 0; i < split.length; i++) {
String str = (split[i].startsWith("#") ? "" : "#") + split[i];
float[] comp = Color.decode(str).getRGBComponents(null);
float a = max(0, min(1f, ((float) i) / transparency));
result[i] = new Color(comp[0], comp[1], comp[2], a);
}
return result;
} catch (Exception e) {
System.out.println(e);
return colors;
}
}
private void sleep(long ms) {
try {
Thread.sleep(ms);
} catch (InterruptedException e) {}
}
private void render(Graphics g) {
if (clearScreen) {
clear(g);
clearScreen = false;
}
int size = min(canvas.getWidth(), canvas.getHeight());
drawCantor(size / 2, size / 2, (int) (size * 0.45), angle, recursions, g);
angle += angleStepSize;
}
private void drawCantor(int x, int y, int r, double a, int times, Graphics g) {
if (times <= 0) {
return;
}
g.setColor(colors[times % colors.length]);
drawMidCircle(x, y, r, g);
double nextAngel = alternateSign * a;
if (cantor) {
// Cantor set
int x1 = (int) (r / 3 * cos(a));
int y1 = (int) (r / 3 * sin(a));
drawCantor(x + 2 * x1, y + 2 * y1, r / 3, nextAngel, times - 1, g);
drawCantor(x - 2 * x1, y - 2 * y1, r / 3, nextAngel, times - 1, g);
} else {
// Bisect
int x1 = (int) (r / 2 * cos(a));
int y1 = (int) (r / 2 * sin(a));
drawCantor(x + x1, y + y1, r / 2, nextAngel, times - 1, g);
drawCantor(x - x1, y - y1, r / 2, nextAngel, times - 1, g);
}
}
private void drawMidCircle(int x, int y, int r, Graphics g) {
g.drawOval(x - r, y - r, 2 * r, 2 * r);
}
private void clear(Graphics g) {
g.setColor(Color.white);
g.fillRect(0, 0, canvas.getWidth(), canvas.getHeight());
}
}Sun Doclet API
Since Java 1.2, the javadoc command has generated neatly formatted documentation. The tool comes with its own API which allows customised output. The relevant classes are under the com.sun package hierarchy, and located in JRE_HOME/lib/tools.jar, which typically will have to be included manually. E.g. it can be found under /usr/lib/jvm/java-8-openjdk-amd64/lib/tools.jar.
Note that the Sun Doclet API is getting long in th tooth, and is already slated for replacement in Java 9, through the “Simplified Doclet API” in JDK Enhancement Proposal 221. Java 9 is planned for Q3 2017.
Meanwhile, the old Doclet API still does an OK job of parsing JavaDoc in .java source files. If the goal is to parse, rather than to produce the standard formatted JavaDoc, it’s useful to start the process pragmatically. Than can be achieved through its main class, com.sun.tools.javadoc.Main:
    Main.execute("MyName", SunDocletPrinter.class.getName(),
        new String[] { "com/rememberjava/doc/SunDocletPrinter.java" });
The execute() method will invoke the public static method start() in the specified class. In the example below, a few of the main JavaDoc entities are enumerated. The direct output can be see the block below. The class which is parsed is the example class itself, included at the bottom of this article.
  public static boolean start(RootDoc root) {
    System.out.println("--- start");

    for (ClassDoc classDoc : root.classes()) {
      System.out.println("Class: " + classDoc);

      // Class annotations
      for (AnnotationDesc annotation : classDoc.annotations()) {
        System.out.println("  Annotation: " + annotation);
      }

      // Class JavaDoc tags
      for (Tag tag : classDoc.tags()) {
        System.out.println("  Class tag:" + tag.name() + "=" + tag.text());
      }

      // Global constants and fields
      for (FieldDoc fieldDoc : classDoc.fields()) {
        System.out.println("  Field: " + fieldDoc);
      }

      // Methods
      for (MethodDoc methodDoc : classDoc.methods()) {
        System.out.println("  Method: " + methodDoc);

        // Method annotations
        for (AnnotationDesc annotation : methodDoc.annotations()) {
          System.out.println("    Annotation: " + annotation);
        }

        // Method JavaDoc comment (without parameters)
        System.out.println("    Doc: " + methodDoc.commentText());

        // Method JavaDoc (only the first sentence)
        for (Tag tag : methodDoc.firstSentenceTags()) {
          System.out.println("    Tag: " + tag);
        }

        // Method parameters (without return)
        for (ParamTag paramTag : methodDoc.paramTags()) {
          System.out.println("    Param:" + paramTag.parameterName() + "=" + paramTag.parameterComment());
        }

        // The full method JavaDoc text
        System.out.println("    Raw doc:\n" + methodDoc.getRawCommentText());
      }
    }

    System.out.println("--- the end");
    return true;
  }
- start main
Loading source file com/rememberjava/doc/SunDocletPrinter.java...
Constructing Javadoc information...
--- start
Class: com.rememberjava.doc.SunDocletPrinter
  Annotation: @java.lang.Deprecated
  Class tag:@author=Bob
  Class tag:@since=123
  Class tag:@custom=Custom Annotation
  Class tag:@see="http://docs.oracle.com/javase/6/docs/technotes/guides/javadoc/doclet/overview.html"
  Field: com.rememberjava.doc.SunDocletPrinter.SOME_FIELD
  Method: com.rememberjava.doc.SunDocletPrinter.main(java.lang.String[])
    Annotation: @java.lang.SuppressWarnings("Test")
    Doc:
    Raw doc:
 @see "http://docs.oracle.com/javase/7/docs/technotes/guides/javadoc/standard-doclet.html"

  Method: com.rememberjava.doc.SunDocletPrinter.start(com.sun.javadoc.RootDoc)
    Doc: This method processes everything. And there's more to it.
    Tag: Text:This method processes everything.
    Param:root=the root element
    Raw doc:
 This method processes everything. And there's more to it.

 @param root
          the root element
 @return returns true

--- the end
- done execute
Here is full file, which also shows the JavaDoc the example operates on.
/* Copyright rememberjava.com. Licensed under GPL 3. See http://rememberjava.com/license */
package com.rememberjava.doc;

import com.sun.javadoc.AnnotationDesc;
import com.sun.javadoc.ClassDoc;
import com.sun.javadoc.FieldDoc;
import com.sun.javadoc.MethodDoc;
import com.sun.javadoc.ParamTag;
import com.sun.javadoc.RootDoc;
import com.sun.javadoc.Tag;
import com.sun.tools.javadoc.Main;

/**
 * Example self-contained Doclet which prints raw text.
 *
 * @author Bob
 * @since 123
 * @custom Custom Annotation
 * @see "http://docs.oracle.com/javase/6/docs/technotes/guides/javadoc/doclet/overview.html"
 */
@Deprecated
public class SunDocletPrinter {

  public static String SOME_FIELD;

  /**
   * @see "http://docs.oracle.com/javase/7/docs/technotes/guides/javadoc/standard-doclet.html"
   */
  @SuppressWarnings(value = { "Test" })
  public static void main(String[] args) {
    System.out.println("- start main");
    Main.execute("MyName", SunDocletPrinter.class.getName(),
        new String[] { "com/rememberjava/doc/SunDocletPrinter.java" });
    System.out.println("- done execute");
  }

  /**
   * This method processes everything. And there's more to it.
   *
   * @param root
   *          the root element
   * @return returns true
   */
  public static boolean start(RootDoc root) {
    System.out.println("--- start");

    for (ClassDoc classDoc : root.classes()) {
      System.out.println("Class: " + classDoc);

      // Class annotations
      for (AnnotationDesc annotation : classDoc.annotations()) {
        System.out.println("  Annotation: " + annotation);
      }

      // Class JavaDoc tags
      for (Tag tag : classDoc.tags()) {
        System.out.println("  Class tag:" + tag.name() + "=" + tag.text());
      }

      // Global constants and fields
      for (FieldDoc fieldDoc : classDoc.fields()) {
        System.out.println("  Field: " + fieldDoc);
      }

      // Methods
      for (MethodDoc methodDoc : classDoc.methods()) {
        System.out.println("  Method: " + methodDoc);

        // Method annotations
        for (AnnotationDesc annotation : methodDoc.annotations()) {
          System.out.println("    Annotation: " + annotation);
        }

        // Method JavaDoc comment (without parameters)
        System.out.println("    Doc: " + methodDoc.commentText());

        // Method JavaDoc (only the first sentence)
        for (Tag tag : methodDoc.firstSentenceTags()) {
          System.out.println("    Tag: " + tag);
        }

        // Method parameters (without return)
        for (ParamTag paramTag : methodDoc.paramTags()) {
          System.out.println("    Param:" + paramTag.parameterName() + "=" + paramTag.parameterComment());
        }

        // The full method JavaDoc text
        System.out.println("    Raw doc:\n" + methodDoc.getRawCommentText());
      }
    }

    System.out.println("--- the end");
    return true;
  }
}